How to Install (Windows)
Preparation for Installation
This software is installed using an installer. Please download them from the respective links below.
Main Program
Our modified calculation engines (Quantum ESPRESSO / LAMMPS)
Additional GNN force field model files (Required only if using FAIR-Chem or SevenNet)
Installation
First of all, execute the Advance/NeuralMD installer. When the language selection screen appears, select the language that will be used during installation (not the language used in the software itself).
Follow the on-screen instructions to set up the installation.
When using a floating license as a client, select ‘No’ for the “Install Sentinel-LDK-RTE?” prompt.
If the license server is on a different network segment, enter the license server’s IP address or hostname on the next screen. Even if you do not specify it here, you can configure the license server’s IP address or hostname later. For details, refer to Floating license.

After the setup is complete, a summary screen will appear.
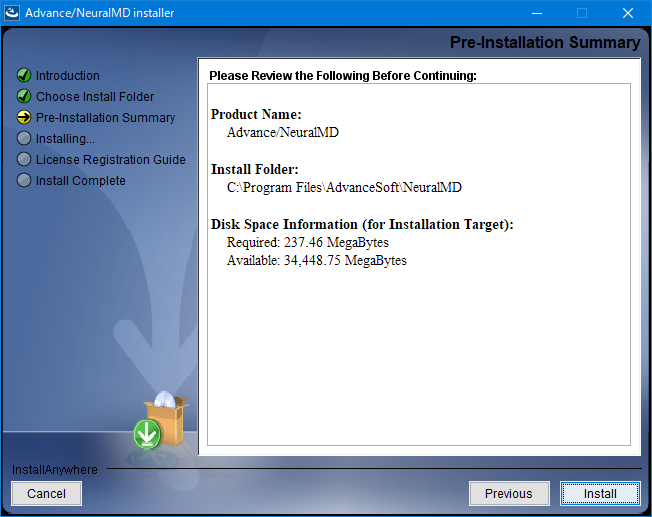
Clicking Finish on the last screen will complete the Advance/NeuralMD installation.
Then run the Advance/NanoLabo Tool installer.
Follow the on-screen instructions to set up the installation.
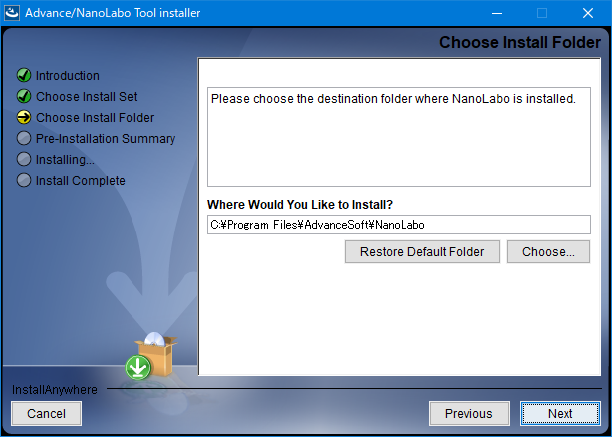
After the installation, click Finish on the last screen to complete the installation of the Advance/NanoLabo Tool.
If using FAIR-Chem or SevenNet, please also install Advance/NanoLabo GNNP in the same way.
For information on how to use the calculation engines (Quantum ESPRESSO and LAMMPS) included with the Advance/NanoLabo Tool, please refer to Calculation Engines included in Nanolabo Tool.
License Configuration
Follow the procedure in License Setup and Update to configure the license.
Update/Upgrade
When upgrading from the trial version to the full version, there is no need to perform a new installation. Refer to License Update to update only the license.
When updating to a new version, it is possible to perform an overwrite install. However, uninstalling the previous version or changing the installation location beforehand is recommended.
When updating to a new major version of NeuralMD, a license update is required. Please update the license by referring to License Update.
Uninstallation
Launch the uninstaller in one of the following ways.
Right click on the Start button and open “Apps and Features”. Click on Advance/NeuralMD in the list and click the Uninstall button.
Open “Control Panel” in “Windows System Tools” from the Start menu. Open “Uninstall a Program” (or “Programs and Features” if the icon is displayed) and double-click Advance/NeuralMD in the list.
Launch
Change NeuralMD Installation.exein the_NeuralMD_installationfolder of the installation location.
Follow the on-screen instructions to uninstall the software.
Note
When trying to launch the uninstaller on Windows 11, errors like “This Application has Unexpectedly Quit” or “Flexeraayd$aaa: Windows DLL failed to load” may be displayed.
This can be avoided by setting the environment variable JAVA_TOOL_OPTIONS="-Dos.name=Windows 10". To apply this only to the uninstaller, for example, create a batch file like the following and run it with administrator privileges.
set JAVA_TOOL_OPTIONS="-Dos.name=Windows 10"
"C:\Program Files\AdvanceSoft\NanoLabo\_NanoLabo_Tool_installation\Change NanoLabo Tool Installation.exe"
After uninstalling Advance/NeuralMD, uninstall Advance/NanoLabo Tool in the same manner.
Note
Installation log files may remain after uninstallation. Also, if you are using a FlexNet license, the license file will remain undeleted. In such cases, please delete them manually.
Note
Sentinel-LDK-RTE is installed under the name “Thales Sentinel LDK Run-time Environment”. To uninstall it later, please uninstall that program.